1:20
Monday 7 February 2011
Sunday 6 February 2011
Research and Development into Industry Requirements
Compositing
I found a skillset outline for a compositing job, which effectively indicates how I can achieve a successful visual effects sequence while proving my suitability for employment.
“Compositors work in most areas of animation and post production.
They are responsible for constructing the final image by combining layers of previously created material. Although it is primarily a 2D role within the 3D world of CGI and VFX (Visual Effects), Compositors need a thorough understanding of the CG process combined with relevant artistic skills.
In post production companies, some TDs (Technical Directors) may do their own compositing.
What is the job?
Compositors work at the end of the production process. They receive material from various sources which could include rendered computer animation, special effects, graphics, 2D animation, live action, static background plates, etc.
Their job is to creatively combine all the elements into the final image, ensuring that the established style of the project is respected and continuity is maintained.
To achieve this they enhance the lighting, match blacks and other colour levels, add grain where required, add motion blur (if appropriate), create convincing shadows and make sure levels combine together seamlessly, keying (see glossary), rotoscoping and creating mattes where necessary.
They work closely with Lighters and need to have technical knowledge of how 3D lighting works in order to understand the 'multi passes' that the lighters create. They also liaise closely with Render Wranglers to progress work through the department.
Compositors need the talent to make artistic judgements, the technical skills to take practical decisions and the ability to analyse and solve problems.
Key Skills include:
- extensive knowledge of current compositing software such as Shake and After Effects;
- knowledge of various other programmes including Photoshop;
- understanding of 3D animation process, particularly Lighting;
- a good eye for composition, colour, light and shadow;
- good knowledge of keying process;
- methodical and thorough approach to work, and attention to detail;
- ability to communicate with colleagues and work as part of a team;
- ability to take direction and willingness to address comments and make changes;
- ability to work with a minimum of supervision;
- ability to deliver on schedule, working under pressure if required;
- respect for the procedures and requirements of a particular studio, production or pipeline;
- Knowledge of the requirements of the relevant Health and Safety legislation and procedures”
http://www.skillset.org/animation/careers/article_4926_1.asp
Show-reel Criteria
While searching for suitable showreel criteria I found a handy list of showreel tips on Double Negative Visual Effects' recruitment page (http://www.dneg.com/jobs).
While these are only the opinions of one visual effects company, they will prove very useful to consider when creating my own showreel to send to companies.
- Firstly, and most importantly, please ensure that your showreel is on a playable DVD video, not in quicktimes, and that it is working correctly. Print out your CV/resume and post this in with your reel and a breakdown sheet that highlights exactly what parts of the shots on the reel are yours. Just in case these get separated, make sure that your DVD also has your name and contact information on it - please add this in permanent marker, as a sticker can cause the DVD to jump.
- We only want to see the work that you're truly proud of. Ideally, the reel shouldn't be much longer 2 minutes for graduates and 3 minutes for experienced professionals (although this is only a guideline) and your best work should be at the start of the DVD. If you are a recent graduate, make sure that you put a snappy montage of your best bits of work on there, please don't just send in your final year project.
- Where possible, add in breakdowns and passes for your shots - ie. If you are a Modeller, add the topology to your render and if you have a compositing showreel, show roto mattes and before and after breakdowns so that we can see how you work. It can also be helpful in 3D to show your UV layouts, and also displacement maps as well.
- Don't spend too much time editing your reel to music - we watch most reels on mute as we're only interested in the images!
Justification of choices made
My desired job would involve 3D modelling and animation, so I have made this the focus of my visual effects sequence while still meeting the requirement of integrating digital elements with real world film. My aim is to make the model look and act as realistically and believably as possible and place this convincingly in my real world footage, which will require good modelling and animation skills as well as a good understanding of lighting and compositing techniques. When placed in my showreel I believe this sequence will show my suitability for employment in 3D Modelling, Animation and Visual Effects.

Research into proposed techniques
3D Elements
In order to create the 3D snake creature, there are several steps I will have to take.
Matchmoving
After capturing my footage, I will need to use matchmoving software such as syntheyes to create a digital representation of the camera. It is important to make sure the captured footage has enough standout elements to allow a good track. This will ensure any 3D elements I create will sync with the elements in the shot footage, making the 3D elements realistically appear as if they are in the scene.
Modelling and Texturing
First, I will model the snake to as high a quality as possible, to ensure it looks realistic. I will also have to texture the snake. As the snake will be fairly close to the camera in some points, it is important that I create the textures to a high enough resolution and quality that the illusion is not lost.
Rigging
After the model is complete and the textures have been created, I will need to create a custom rig to allow the snake creature to be animated. This will be done using the CAT system within 3DS Max as it will allow me to create a custom rig to suit the model very easily.
Animation
I will animate the snake creature using the custom rig I create, keyframing each bone to create realistic snake-like animation. It may be useful to create simple 3D representations of some elements such as trees to help convincingly animate sections where the creature will interact with these elements.
Lighting
It will be important that the 3D elements are lit in the same way as the live footage. For this reason I will have to be mindful of the lighting when capturing the footage, and attempt to convincingly recreate this within my 3D scene before rendering. It may also be useful to create simple 3D representations of some objects within the captured footage and set them to receive shadows only, such as trees. This will allow me to render the creature along with the shadows it would cast on the surrounding objects, creating a much more convincing illusion.
Compositing
To ensure the most streamlined integration of the 3D elements, I will render them in passes as image sequences with the alpha channels in place. This will allow me to combine the separate passes within after effects and overlay them onto the captured footage easily. After this, several steps will need to be taken to make the CG elements realistically appear to be in the scene.
Colour Correction
It is very likely that the 3D elements will stand out when placed in the live footage, so colour correction will need to be added to make the colour range of the 3D elements match that of the footage.
Masking
It will be important to mask off any elements of the original footage that the 3D elements would sit behind, in order to ensure the 3D elements appear to be in the scene.
Saturday 5 February 2011
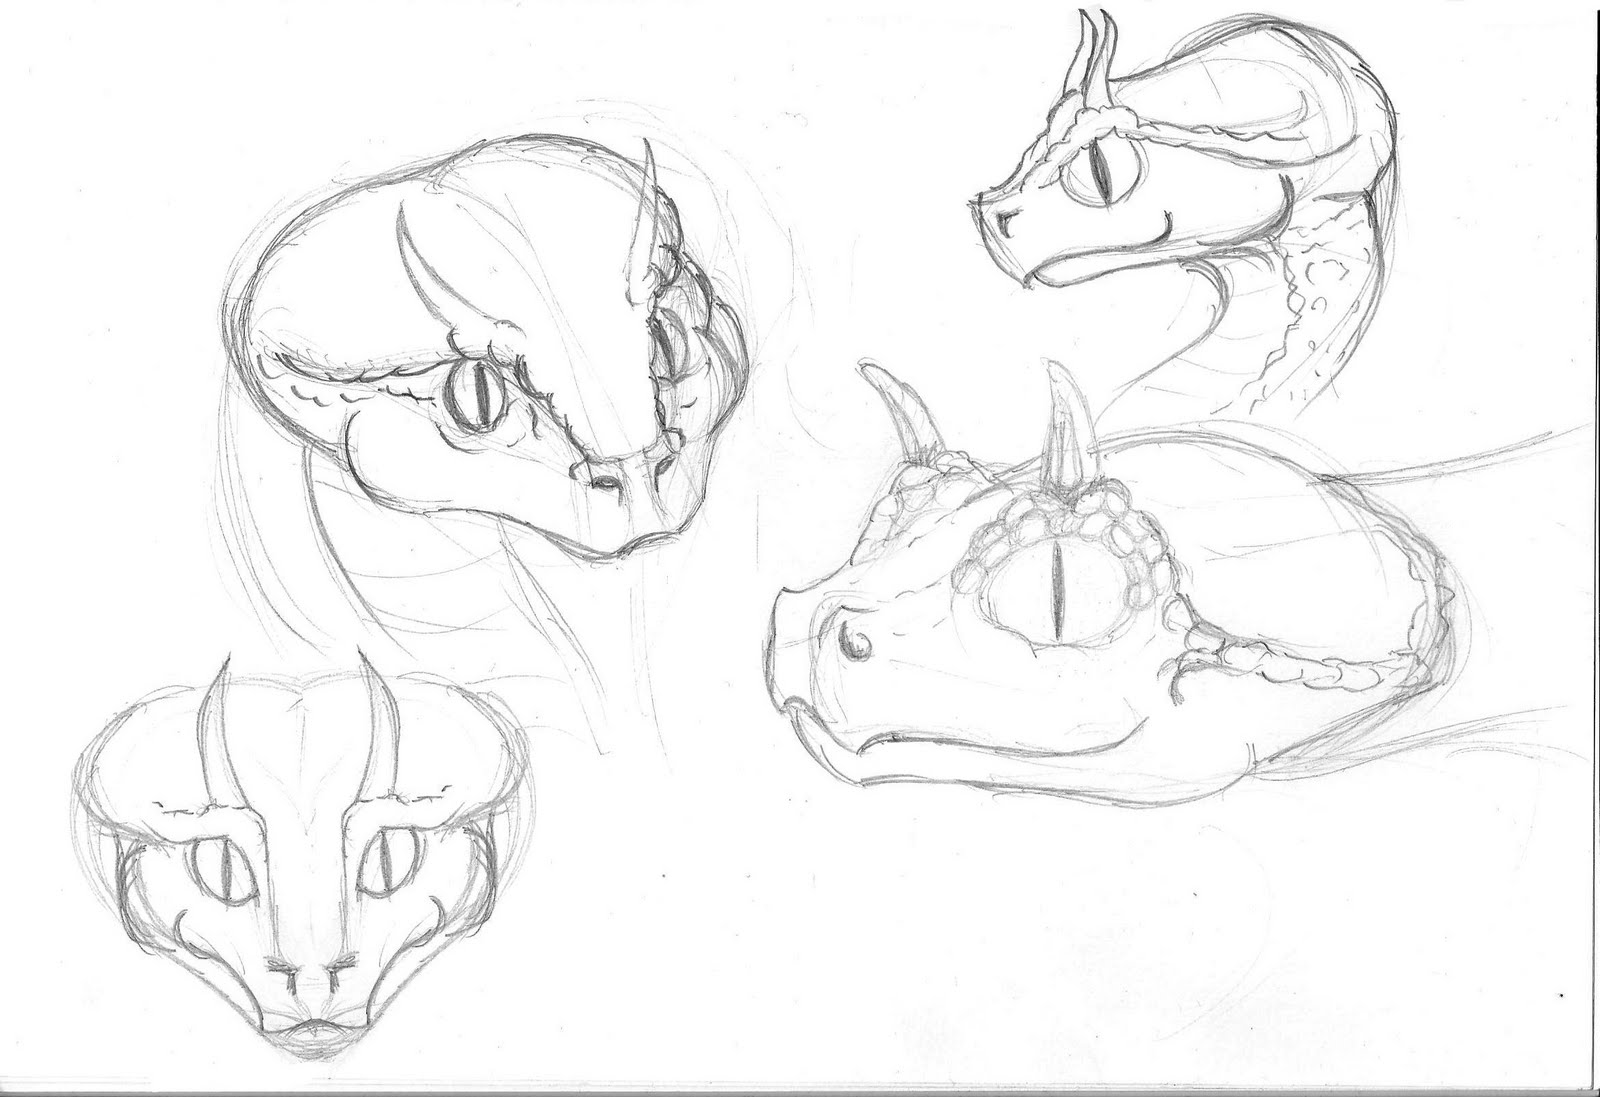
Creature Concept Sketches
After researching various types of snake and dinosaurs I created the following sketches to show how the snake creature in my sequence may look.

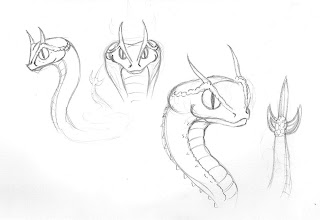
After creating some sketches I was happy with, I decided to attempt to create a 3D sketch in zbrush, concentrating mainly on the face. I am very happy with how this turned out and found it allowed a lot more freedom and experimentation than simple pencil and paper.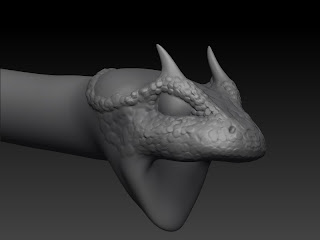

After creating some sketches I was happy with, I decided to attempt to create a 3D sketch in zbrush, concentrating mainly on the face. I am very happy with how this turned out and found it allowed a lot more freedom and experimentation than simple pencil and paper.

Idea Overview
I propose to create a visual effects sequence with 3d elements composited into real footage. I plan to model, texture, rig and animate a snake-like creature and convincingly integrate it into real life woodland footage. The sequence will be created with the idea that it will be a short scene in a thriller/horror movie based around the snake-like creature.
Visual Effects Blog
As part of my university course I will be creating a visual effects sequence.
I have created this blog as a means of documenting and annotating my tests, renders, prototypes and ideas as the piece progresses from concept to the finished sequence.
I have created this blog as a means of documenting and annotating my tests, renders, prototypes and ideas as the piece progresses from concept to the finished sequence.
Subscribe to:
Posts (Atom)